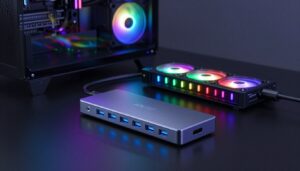
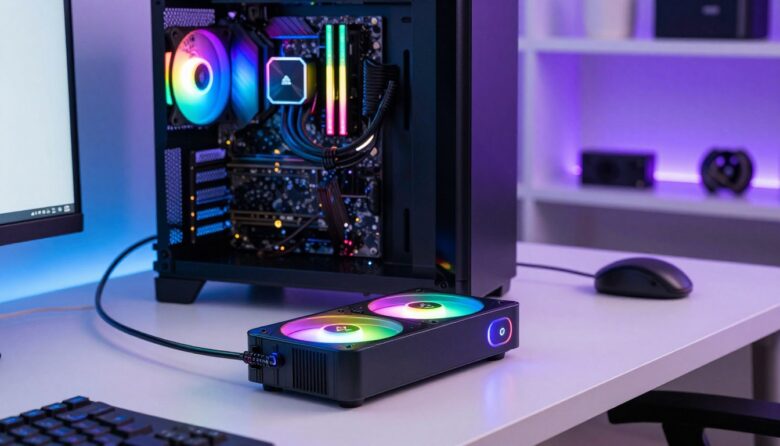
I build and test PC systems, and I know a good hub can change how a case looks and runs. A dedicated argb hub acts as a command center for lighting and cooling, keeping cables neat and fans in sync.
Proper power delivery is a must. I prefer a SATA connection for steady voltage so LEDs and fans run without overloading the motherboard.
I also value simple connections. A quality case fan hub or an argb fan hub gives extra ports and tidy cable routing, which helps airflow and reduces noise.
Whether you favor a magnetic fan hub or a standard controller, the right product makes setup easier and the system faster.
Key Takeaways
- A hub centralizes lighting and fan control for cleaner cable management.
- SATA power support prevents motherboard overload and stabilizes LEDs.
- Extra ports on a case fan hub expand motherboard capability.
- Splitters and proper pin wiring simplify 12v and 5v setups.
- A good controller improves cooling efficiency and aesthetic sync.
Understanding the Role of ARGB Hubs in Modern PC Builds
Using a hub lets me sync dozens of LEDs and fans without juggling multiple motherboard headers. A central controller simplifies wiring and reduces clutter inside the case.
The Benefits of Centralized Control
Centralized control makes it simple to manage power and signal flow for fans and light strips. I use a fan hub or argb hub to gather PWM and ARGB lines in one place.
That setup frees motherboard headers and gives stable power via a SATA connection when needed. Splitters still help, but a dedicated hub keeps pwm and lighting consistent.
Understanding ARGB vs RGB
Know the pin and voltage differences. RGB uses 12V 4-pin and controls a single color per strip. ARGB uses 5V 3-pin and lets each LED change independently.
Never mix 12V rgb with 5V argb parts; that can damage strips or the controller. Pick a hub that supports the type of connection and enough ports for your fans and strips.
| Feature | RGB (12V) | ARGB (5V) | Hub Role |
|---|---|---|---|
| Pin | 4-pin | 3-pin | Matches connection type |
| Control | Single color | Per-LED control | Centralizes signals |
| Power | Higher voltage | Lower voltage | Provides stable SATA power |
| Use | Simple light | Complex effects | Manages ports and cables |
Essential Technical Specifications for Your Lighting Setup
When I plan a lighting layout, I focus on the specs that keep signals and power stable. Simple checks up front save time and protect components.
Standard connections are 5V 3-pin for argb and 4-pin for pwm RGB. I verify the pin configuration on a hub so every fan and strip plugs in correctly.
Never mix 5V 3-pin parts with 12V 4-pin headers. Doing so can cause irreversible damage to LEDs and controllers.
- I check that my fan hub supports both 5V 3-pin argb and 4-pin pwm connections for full compatibility.
- Every hub I pick must offer enough ports and a stable SATA power feed to run fans and led strips safely.
- I prefer a controller that handles pwm argb signals so lighting and cooling stay in sync with motherboard software.
| Spec | Connection | Risk |
|---|---|---|
| argb | 5V 3-pin | Mismatching with 12V will damage parts |
| rgb / pwm | 12V 4-pin / 4-pin PWM | Use correct header or adapter |
Why External Power Delivery Matters for System Stability
A steady power feed keeps lighting crisp and fan speed predictable in heavy builds. I rely on a dedicated hub to move voltage demands off the motherboard and onto the supply.
SATA power on a hub gives consistent electricity to strips and fans. That prevents flickering, dimming, or erratic fan behavior that I see when too many devices draw from a motherboard header.
Avoiding Motherboard Header Overload
Motherboard 5V 3-pin headers have limits. I never push more than a few argb devices directly to those pins.
- I always use a hub with dedicated sata power so my argb lighting and cooling fans get stable voltage.
- Connecting many fans to one motherboard header risks overload; a powered hub protects the board.
- Offloading power to a SATA-powered hub stops flicker and keeps pwm and rgb effects consistent.
Practical rule: pick a hub with robust power design and enough ports to match the number of fans and strips in your case. I hook the hub to the PSU with a sata cable every time to avoid strain on the motherboard and keep the system running smoothly.
Top Recommendations for the Best ARGB Hubs
I focus on products that deliver stable power, clean cable routing, and enough ports for the fans and strips I plan to install.

Budget-Friendly Options
Asiahorse and SNOWMAN give lots of ports at a low price. They work well as a case fan hub or argb fan hub in compact builds.
- High port density for many fans and led strips.
- Affordable design that still supports a reliable sata power connection.
Advanced Controllers with Remote Access
The COOLMOON PA2 adds a wireless remote so you can tweak lighting without motherboard software. I use it when I want local control and complex effects.
Ecosystem-Specific Solutions
If you run a Corsair iCUE setup, use the manufacturer’s dedicated hub for full support. Brand-specific controllers ensure pin argb and pin pwm compatibility and smooth software control.
Quick tip: choose a unit that supports pwm argb signals, has enough ports, and includes sata power to keep fans and lighting stable across your case and computer.
Evaluating Build Quality and Safety Features
I inspect each hub’s construction to spot weak solder joints and cheap connectors before I buy.
Durable hardware matters. I look for a minimum 1.6mm PCB thickness and gold-plated connectors to resist corrosion and wear.
Safety features are next. I only use a unit with integrated surge protection and replaceable fuses to guard the motherboard and fans.
“I prefer a controller rated for long life and built to protect every pin and cable in the case.”
- Lifespan: aim for products rated at 50,000+ hours so lighting and cooling run for years.
- Compatibility: never mix 12v 4-pin rgb parts with 5v argb devices — that can cause catastrophic failures.
- Materials: solid connectors and durable cable jackets reduce stress on pins and prevent shorts.
| Feature | What I Check | Why It Matters |
|---|---|---|
| PCB | ≥1.6mm, quality solder | Less flex, fewer cold joints |
| Connectors | Gold-plated, secure latch | Corrosion resistance, reliable contact |
| Protection | Surge guards, fuses | Prevents overcurrent to motherboard |
| Ratings | 50,000+ hour life | Long-term stable lighting and fan control |
My rule: choose a well-built hub and controller so your case wiring stays tidy and your power delivery stays safe.
Integrating Your Hub with Motherboard Software
I make sure my hub connects cleanly to motherboard software so lighting and cooling act as one system.
Start with compatibility. Check that your fan hub lists support for ASUS Aura Sync, MSI Mystic Light, Gigabyte RGB Fusion, or ASRock Polychrome Sync. If you run a corsair icue setup, verify support or plan to use the product’s remote or proprietary controller instead.

Syncing with Major Motherboard Platforms
When I link a hub to the motherboard, I confirm the pwm and argb signals follow the correct pin mapping. That keeps pwm argb effects and fan speed tied to temperature sensors.
I always test the software integration to ensure all argb fans and led strips are detected and respond to changes. A powered hub with sata support and enough ports makes detection more reliable.
- I sync my fan hub with ASUS Aura Sync or MSI Mystic Light to unify lighting across the case.
- For Gigabyte RGB Fusion or ASRock Polychrome Sync, I confirm the hub firmware and connection type match the motherboard pin layout.
- If a product needs its own app or remote, I weigh that trade-off before purchase to avoid split control.
| Platform | What I check | Result |
|---|---|---|
| ASUS Aura Sync | 3-pin argb mapping | Unified lighting control |
| MSI Mystic Light | PWM routing for fans | Fan speed + effects synced |
| corsair icue | Vendor support or remote | Full or partial control |
“Proper connection and software support are the difference between synced, responsive lighting and a fragmented setup.”
Pro Tips for Clean Cable Management
Good cable routing protects connectors and keeps my pwm and argb lines reliable over time.
I always start by grouping wires. Zip ties and cable combs make it easy to align each cable from fans and led strips. That keeps the main chamber clear and helps cooling.
I route lines along the edges of the case and hide extra length behind the motherboard tray. This keeps airflow unobstructed and makes future swaps quick.
- I use zip ties to bundle my argb fan and pwm fan cables for a tidy look and steady speed.
- A magnetic fan hub or compact case fan hub mounts out of the way and centralizes connection points.
- High-quality splitter use reduces the number of runs to the hub, keeping ports tidy.
Tip: secure every strip and connector so troubleshooting is simple. A clean layout not only looks sharp, it protects pins and keeps fans and lighting working reliably.
Final Thoughts on Choosing Your ARGB Hub
Picking the right controller can save you hours of setup and cut the chance of wiring mistakes. I recommend a fan hub that offers clear pin mapping and steady sata power so lights and fans stay stable.
Check the type of controller and the product support for your motherboard before you buy. I prefer a unit that handles both rgb strips and argb fan hub connections to keep control simple.
Verify 12v and 5v needs, confirm overall power limits, and choose a hub that matches your computer’s layout. With the right product, you get clean wiring, synced lighting, and reliable cooling every time.
FAQ
What does a fan hub or addressable lighting controller do in a custom PC build?
I use a controller to centralize power and signal for multiple fans, LED strips, and ARGB fans so I can manage lighting and fan speed from one place. A hub reduces cable clutter and prevents overloading motherboard headers by moving power draw to a SATA or Molex connection, while PWM support lets me control fan speed precisely.
How do I tell the difference between addressable lighting and standard RGB?
I look at the connector pins. Addressable lighting uses a 3-pin 5V ARGB header with a data pin, while standard RGB uses a 4-pin 12V connector with a shared voltage line. Addressable strips and fans let me set individual LED colors, whereas 4-pin RGB shows one color across the whole strip or fan.
Can I run many fans and strips from a single hub without damaging my motherboard?
Yes—if the hub has its own SATA power input or Molex adapter. That external power supplies the LEDs and fans, so the motherboard header only handles control signals. I always check the hub’s current rating and the combined draw of my fans and LED strips to avoid overheating or overcurrent.
What should I check in technical specs when choosing a hub or controller?
I review supported connector types (3-pin addressable, 4-pin RGB, PWM), SATA or Molex power input, max amperage per channel, number of ports, and compatibility with motherboard software like ASUS Aura Sync, MSI Mystic Light, Gigabyte RGB Fusion, and Corsair iCUE. Also look for PWM fan headers if you want automated speed control.
Is third-party lighting software reliable for syncing lights with my motherboard?
Many third-party controllers work fine, but I prefer hubs that officially support my motherboard’s ecosystem. Official support usually avoids sync conflicts and offers smoother control. If I choose an independent controller, I check for drivers, firmware updates, and community feedback first.
Do I need PWM headers on the hub for fan speed control?
If I want precise RPM control, yes. A hub with PWM support and a 4-pin PWM fan connector lets the motherboard or controller adjust fan speed automatically based on temperature. Without PWM, fans run at fixed or voltage-controlled speeds, which gives less control.
How many fans can a typical case fan hub handle, and what about magnetic hubs?
Entry-level hubs often support 4–8 fans or ARGB devices, while larger controllers can handle 10–20 ports. Magnetic fan hubs offer easy placement inside a case but still need external power. I count my fans and strips, add a margin, and pick a hub with extra ports to future-proof the build.
Are there safety features I should look for in a hub or controller?
I look for overcurrent protection, short-circuit protection, thermal safeguards, and secure SATA/Molex connectors. Good build quality, solid solder joints, and a reliable enclosure reduce the risk of failure. Brands with firmware support and clear documentation also help prevent misuse.
How do I manage cables for multiple LED strips and fans cleanly?
I route cables along case edges, use zip ties and Velcro straps, and group power and signal cables separately. Short splitters and extension cables help position the hub closer to fans. Magnetic or stick-on hubs let me place the controller near the cables to shorten runs and keep the interior tidy.
Can I mix fans from different brands on one controller or motherboard header?
Generally yes, but I avoid mixing different voltage types on the same channel. I can mix PWM fans from various brands on a PWM-equipped hub, and addressable LED strips from different makers on a 5V controller, provided they follow the same pinout and voltage specs. Always verify connector pin alignment before connecting.
What role does external power delivery play in overall system stability?
External power ensures that LEDs and multiple fans don’t pull too much current through the motherboard, preventing resets, header damage, and dimming. I use a hub with a dedicated SATA or Molex power input so the PSU handles the heavy load, keeping the system stable under full lighting and cooling demands.
Are ecosystem-specific controllers necessary for software features like Corsair iCUE?
If I want full functionality—like advanced effects, temperature-based profiles, and firmware updates—using a controller that integrates with Corsair iCUE, ASUS Aura Sync, or other vendor software is helpful. However, many independent controllers offer broad compatibility and manual controls if software integration isn’t a priority.
What adapter or splitter types should I keep on hand when building?
I keep SATA-to-Molex adapters, 3-pin to 4-pin breakout cables, PWM splitters, and various ARGB splitters. These let me connect mixed devices, power hubs properly, and extend reach when needed. Having a few short extension cables avoids forced bends and connector stress.
How do I update firmware or troubleshoot lighting sync issues?
I check the manufacturer’s site for firmware tools and follow step-by-step instructions. For sync problems, I ensure only one software controls lighting at a time, update all drivers, and reboot the system. If a device still misbehaves, I test components individually to isolate the faulty fan, strip, or cable.
Can LED strips and fans cause interference with fan speed readings or PWM control?
Rarely, but poor-quality splitters or mismatched connectors can introduce noise. I use shielded cables and quality hubs with proper grounding. If RPM readings are inconsistent, I check the tachometer wire on PWM fans and ensure signal wires aren’t bundled tightly with power lines.

Adrian Voss is an RGB lighting specialist and tech writer focused on customization, performance, and smart lighting systems. He shares hands-on insights, reviews, and setup guides to help users take full control of their RGB controllers and create immersive, personalized environments.