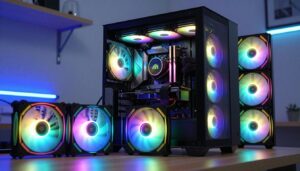
I wrote this guide to help you set up lighting hardware with confidence. Many SilverStone models that carry a “PRO” name ship with a built-in 4-port hub. Examples like the SST-FAR1W-PRO and SST-FAH1MB-PRO show how modern designs include ready-made lighting gear for fast builds.
I will walk you through the key requirements for your hardware and how to route power and cables cleanly. You’ll learn to match ports, check power headers, and avoid common mistakes that spoil a tidy build.
My goal is simple: make your internal parts look great inside the case and keep the wiring neat. This short, friendly guide keeps steps clear so you can finish with a polished result.
Key Takeaways
- I provide a clear, step-by-step approach for connecting lighting hardware.
- Many SilverStone “PRO” cases include a ready 4-port hub for quick setup.
- Know your model (like SST-FAR1W-PRO) to match connectors and power needs.
- Good cable and power management yields a professional inside look.
- Follow the steps and you’ll achieve reliable, attractive lighting performance.
Understanding Your ARGB Hardware Components
Before you wire anything, I recommend a quick inventory of the power and lighting plugs in your build. Knowing what each connector does keeps the process fast and safe.
Fan Power Connectors
A 3-pin fan connector has three pins: power, ground, and a signal pin that measures speed. That signal helps the system report RPMs.
A 4-pin PWM connector adds a fourth pin for PWM control. This lets the motherboard pulse the 12V supply to vary speed precisely.
- Tip: Identify whether each fan uses a 3-pin or a 4-pin PWM plug before you proceed.
- Note: A 3-pin fan usually runs at full speed unless your board supports voltage-based control.
ARGB LED Connectors
Most SilverStone argb fans use the industry standard 4-1 pin configuration. The pins represent 5V, data, and ground so lighting signals match across devices.
Check the header on your motherboard for a matching layout to ensure compatibility and to avoid damage.
| Connector | Pins | Main Function | When to Use |
|---|---|---|---|
| 3-pin fan | 3 | Power, ground, speed signal | Basic cooling and RPM reporting |
| 4-pin PWM | 4 | Power, ground, speed, PWM control | Variable speed control via motherboard |
| 4-1 pin ARGB | 4 (5V, data, ground, key) | Addressable LED data and power | Lighting sync with argb fans and headers |
- I always inspect each fan to confirm cable type and avoid surprises.
- Proper identification prevents hardware damage and ensures the lighting and cooling perform as intended.
Preparing Your PC for the Installation Process
Before touching any cables, I like to map out where each header sits on the board and in the case. This quick step prevents surprises and keeps cable runs short.
Consult your motherboard manual to find every fan and lighting header. I mark each connector on the diagram so I know what plugs where.
Next, check the case paperwork to see if it has a built-in hub or a lighting switch. That detail changes where I route cables and mount any extra parts.

- I locate the nearest header motherboard connection to shorten cable paths and improve looks.
- I clear my workspace and sort cables into groups before I mount anything; it saves time.
- Always power down the system and unplug it from the wall before touching headers or internal parts.
These small steps make the rest of the build smoother. When I follow them, cable management stays neat and the whole process is safer.
How to Install ARGB Controller Units Effectively
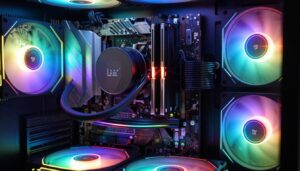
Choose a spot in your case that gives easy access to power and keeps cable runs short. I look for a flat surface near the PSU or behind a drive bay so routing stays neat.
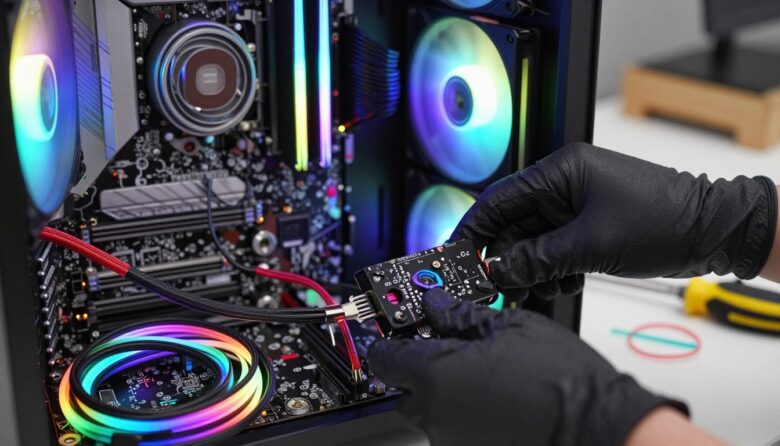
Mounting Your Controller
Pick an accessible location. This makes it simple to reach the unit when I add or swap fans. It also reduces strain on plugs and keeps wiring tidy.
Secure the unit firmly. I fasten the controller with screws or double-sided tape so it does not rattle. A stable mount prevents loose connections and keeps each fan running smoothly.
I use a dedicated hub when I have many argb fans. That lets me group lighting and cooling to one point when motherboard headers are limited.
- I choose positions that allow easy access to the main power supply.
- I group cables so all fan and lighting lines meet the hub in one place.
- I always double-check that the unit cannot vibrate during normal use.
“Proper mounting is the most important step to ensure stable and responsive lighting.”

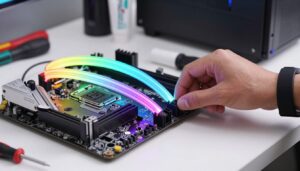
Connecting Your Fans and Lighting Cables
Lay out all fan and lighting cables on your bench so you can see which plug matches each header on the motherboard.
I suggest using a splitter when the number of fans exceeds the available fan headers on your primary motherboard. For PWM control, the SST-CPF02 1-to-3 splitter or the SST-CPF04 1-to-8 hub makes grouping simple.
Note: A 3-pin fan connected to a motherboard header will run at full speed unless the board supports voltage-based adjustments. Check your board specs before you finish routing.
- I plug argb fans either directly into the board or into a dedicated hub for cleaner cable runs.
- Always verify the header motherboard connection can handle the combined power draw of connected fans.
- For many fans, I prefer the SST-CPF04 1-to-8 PWM fan hub to keep wiring tidy and balanced.
“Group cables by purpose and use splitters or hubs to avoid overloading any single header.”
By grouping fan cables and choosing the right splitter or hub, you ensure each header is used correctly and power delivery stays within safe limits.
Managing Power Requirements and Current Limits
Power planning keeps your lights steady and your board safe, so I always add up current before I plug anything in.
The Air Penetrator 140i-ARGB fan draws 0.27A at 12V, which means two of these fans use 0.54A on the 12V rail. Its LEDs pull 0.36A at 5V, so eight argb fans total 2.88A on the 5V line.
Most motherboard ARGB headers tolerate about 3.0A. That limit usually covers common lighting setups, but you should confirm the exact number in your manual before you connect many devices.
- I always calculate total amperage for every fan and LED string so no header motherboard line is overloaded.
- If your eight AP140i-ARGB fans draw 2.88A at 5V, that stays under a typical 3.0A header limit.
- When totals exceed the spec, I use a dedicated hub to protect the header and keep voltages stable.
| Component | Current | Voltage |
|---|---|---|
| AP140i-ARGB fan (single) | 0.27A | 12V |
| AP140i-ARGB LEDs (single) | 0.36A | 5V |
| Eight AP140i-ARGB LEDs (total) | 2.88A | 5V |
“Calculate amperage first and use a hub when totals exceed your header limits.”
Configuring Your Lighting with Software
After wiring, software is the final step that ties your lights and fans together. I use tools that give easy control without bloating system resources.
Using Motherboard BIOS
Many boards let you set basic color presets and speed profiles in BIOS. This is handy when you want simple, reliable behavior before boot.
Quick tip: Use BIOS for safety checks and default modes, then switch to an app for complex effects.
Exploring Open Source Alternatives
I prefer OpenRGB because it is lightweight and replaces several proprietary rgb apps. It runs on Windows, Linux, and MacOS and supports x86, x86_64, ARM32, and ARM64 platforms like the Raspberry Pi.
- OpenRGB reduces background load and avoids conflicting software.
- It supports many devices and lets you control different brands from one place.
- Plugins add effects engines or a visual layout editor for each fan.
Syncing Across Devices
Once your controller is connected, use OpenRGB or a single vendor app to sync all lighting. That keeps patterns consistent and avoids competing profiles.
“A single, lightweight app often gives the best balance of features and system impact.”
Conclusion
Guide complete: finish strong by double-checking headers, amperage, and software sync for a reliable lighting setup.
I hope this guide gave you the confidence to connect your fans and lighting without stress. Take one last pass to confirm current totals and header limits so nothing is overloaded.
Use a lightweight app like OpenRGB to unify effects across devices and avoid conflicting profiles. A quick software test after wiring ensures colors and patterns behave as expected.
With careful planning and these checks, your upgraded PC will look great and run safely. Enjoy the final result—you built it to shine exactly how you imagined.
FAQ
What are the basic hardware parts I need to set up my ARGB lighting?
I need the addressable LED fans or strips, a 3-pin 5V header on the motherboard or a dedicated hub, a Molex or SATA power cable if the hub requires external power, and mounting hardware like double-sided tape or screws. I also recommend checking fan power connectors and the LED connectors to match the headers on the board or hub before starting.
How do I tell the difference between a fan power connector and an LED header?
Fan power connectors are usually 3-pin or 4-pin for RPM and PWM control, while the addressable LED header is a 3-pin 5V JST-SM type with a distinct notch. I always inspect the motherboard manual and parts to confirm pinouts so I don’t plug the cable into the wrong socket.
Can I use a third-party hub with my motherboard’s lighting software?
Often yes. Many hubs support standard 3-pin 5V addressable headers and will sync with mainboard software like ASUS Aura Sync, MSI Mystic Light, or Gigabyte RGB Fusion when the hub connects to the proper header. I suggest checking compatibility lists or product specs first.
What’s the best place to mount a hub or small lighting unit inside my case?
I usually mount a hub near the fans it controls, such as on a drive bay bracket or the rear of the motherboard tray. Use the provided screws or strong double-sided tape and route cables neatly to avoid blocking airflow or interfering with other components.
How do I calculate current draw for multiple addressable LEDs?
Each LED can draw up to about 60 mA at full white. I multiply the per-LED current by the number of LEDs to estimate total current and compare that to the header or hub’s rated output. If the total exceeds the rating, I split the load across multiple headers or add an externally powered hub.
Is it safe to power fans and LED strips from the same header?
No, I avoid powering fans and LEDs from the exact same connector unless the header is explicitly rated for both. Fan power goes to fan connectors for RPM/PWM control, while LED power must go to the 5V addressable header or a dedicated hub to prevent overloading.
What if my motherboard lacks a 5V addressable header?
I recommend using a standalone hub that accepts SATA or Molex power. Those hubs often provide their own 5V outputs for addressable strips and include a remote or controller software. This is a reliable workaround when the board has no native header.
Can I control lighting from both the motherboard BIOS and third-party apps?
Yes. I can set baseline profiles in the motherboard BIOS for startup behavior, then use manufacturer software in Windows for finer control. Some open-source tools also support addressable lighting for advanced users, but compatibility depends on the hardware and drivers.
Are open-source lighting tools a good alternative to vendor software?
They can be, especially if I want cross-platform control or more scripting options. Projects like OpenRGB support many devices, but I always verify hardware compatibility and be prepared to troubleshoot driver issues or firmware quirks.
How do I sync lighting across fans, strips, and accessories?
I connect all addressable LEDs to the same 5V header or to a single hub that supports synchronization, then use the motherboard or hub software to create a unified profile. If devices use different protocols, I match them using a hub that bridges formats or by grouping like-devices under a single controller.
What common mistakes should I avoid when wiring fans and LEDs?
I avoid forcing mismatched connectors, mixing up voltage pins, and daisy-chaining too many LEDs from one header. I also keep power and signal cables tidy to prevent accidental disconnection and ensure fan connectors remain on fan headers for proper speed control.
How do I test my setup before closing the case?
I power on the system briefly after connecting one fan and one LED strip to confirm the header and hub work and that BIOS or software detects the devices. Once confirmed, I add the remaining components and re-test before final cable management and sealing the case.
Will excessive LED load damage my motherboard header?
Yes, overcurrent can damage the header. I always check the header’s amperage rating in the motherboard manual and keep the total LED draw below that limit. If needed, I use an externally powered hub to offload the current safely.
Where can I find compatible fans and hubs from reputable brands?
I look to well-known manufacturers such as Corsair, NZXT, Cooler Master, Thermaltake, and Phanteks. Their product pages list compatibility, cable types, and required headers so I can match fans, hubs, and the motherboard before buying.

Adrian Voss is an RGB lighting specialist and tech writer focused on customization, performance, and smart lighting systems. He shares hands-on insights, reviews, and setup guides to help users take full control of their RGB controllers and create immersive, personalized environments.