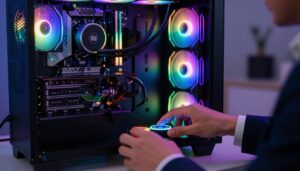
I build and tweak gaming rigs, and I know how it feels when the rgb lights fail. A vivid color scheme can make a case look professional, and a single error can ruin that vibe.
I often find the cause is a loose connector or a power path that was missed during setup. When my fan lights stop working, I start with basic checks and work through each cable and header.
Troubleshooting can be quick if you follow a systematic plan. I test connections, verify software controls, and confirm the hub or controller is receiving power. Even high-end parts suffer from simple wiring mistakes.
By staying methodical, I usually restore full color and proper spin in minutes. This guide will help you find the same easy wins and get your machine back to its bright, gaming-ready look.
Key Takeaways
- Start with simple checks: cables, power, and headers.
- Test each fan and light component one at a time.
- Use the controller or software to rule out configuration issues.
- A loose connector often causes color or spin failures.
- Methodical troubleshooting saves time and preserves your setup.
Understanding Why Your PC RGB Fans Not Lighting Up
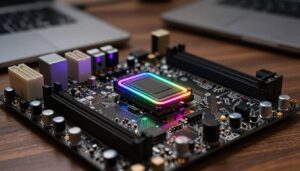
I start by mapping each connector to its header so I know which device the motherboard expects. The MSI Mortar Max B450 manual is my first stop to see how the system manages power for case fans and the lighting controller.
I check whether my Ryzen 5 3600 setup could conflict with the controller or with software control. The Cooler Master MB311L case sometimes requires specific hardware and cable routing that affects how led and rgb signals reach each fan.
Count the devices and confirm the number won’t exceed the motherboard or controller power limits. System information apps can also reveal if a header is reporting no load or missing lights working status.
I always follow manufacturer instructions and read the manual to verify rgb standards and compatibility. If an LED is physically damaged, software changes won’t get those lights working; hardware replacement is the only fix.
Performing a Physical Inspection of Cables and Connections
Before you start, switch the power supply to the “O” position. I confirm the system is fully powered down so I can safely touch any cable or connector.
Work slowly and methodically. A quick visual check often reveals loose plugs or misrouted cables that break the rgb signal or stop a fan from getting power.
Reseating Fan Connectors
I gently unplug and reseat each connector at the controller and the motherboard port. This restores many common connection issues.
I make sure every cable is firmly pushed into the correct port on the controller. If one fan is faulty, I unplug it to see if the remaining lights start working.
Identifying Damaged Wiring
Next, I inspect each cable for cuts, kinks, or pinched insulation. Damaged wiring can interrupt the rgb signal or the power path and cause color sync problems.
I also verify the PSU cable is secure and check the motherboard manual to confirm correct headers when PWM control is used. If a connector looks burnt or bent, I replace it before further testing.
- Tip: Reseating connectors often fixes color and sync issues quickly.
- Check: Confirm the controller receives power and every cable sits correctly.
Troubleshooting the RGB Controller and Power Supply
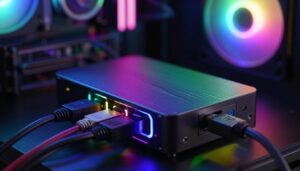
My first step is to trace the main power path from the PSU to the controller and check each plug.
I use an EVGA 650W 80+ Gold PSU to make sure my build gets steady power. That stable source helps keep rgb and fan performance consistent during gaming.

Next, I verify the controller is receiving power at its main input port. A loose cable or wrong port will stop the lights working even if the motherboard and software are fine.
Verifying PSU Power Input
I press the LED button to test modes. One second changes mode, three seconds hands control to the motherboard, and six seconds toggles lights on or off.
“Checking the power feed is the quickest way to rule out a faulty supply or a simple switch error.”
I also confirm the PWM cable sits in the correct motherboard port so the fan speed and hardware control work properly.
- Check the PSU-to-controller connection first.
- Press the LED button for six seconds if the lights appear off.
- Limit the number of devices per controller as per the instructions.
| Item | What I check | Why it matters |
|---|---|---|
| PSU model | EVGA 650W 80+ Gold | Provides stable power to controller and components |
| Controller port | Main input and PWM port | Ensures power and speed control reach the fan |
| LED button | 1s / 3s / 6s functions | Switches mode, motherboard control, and on/off |
Tip: Test different ways to power the controller to rule out a failing psu. Ensure all connectors and cables are seated firmly before moving to software fixes.
Adjusting BIOS Settings for Fan and Lighting Control
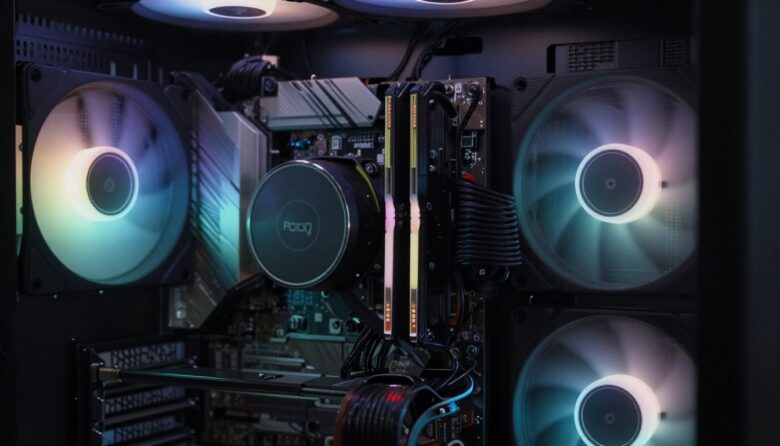
When lights dim or spin slows, I head straight into the BIOS to confirm header modes and speed curves. This section walks through the menu items I check to restore proper RGB behavior and fan speed.

Accessing the BIOS Menu
I access the BIOS menu by pressing the “Del” key during boot. I use the Windows System Information app first to confirm my motherboard model so I know which options to expect.
Configuring PWM Settings
In the hardware monitoring section, I set the CHA_FAN1/WP header to PWM mode. I also ensure the case fan profile is set to Standard so the speed supplies enough power for the lights.
Configuring PWM prevents the fan from spinning too slowly, which can cause dim or flickering RGB lights.
Saving Changes and Rebooting
Once I finish, I press the correct key to save changes and reboot. After the system restarts, I reopen the menu to verify the motherboard detects all fans and that settings stuck.
“Confirm the CHA_FAN1/WP header is set to PWM and save before leaving the BIOS.”
- I check headers and use the system information tool before making changes.
- If a fan does not appear in the BIOS, I revisit the physical connection to the motherboard header.
Managing Software and Driver Configurations
I update drivers first and then open the lighting software so the operating system and controller can communicate cleanly. I find that driver updates often fix backlight and keyboard LED quirks.
I use MysticLight 3 to sync my motherboard and case components. In the app I check the number of connected components and confirm the backlight feature is enabled.
If a device is missing, I press the refresh button. That refresh often rediscovers fans and shows their light status without extra troubleshooting.
“Reinstalling drivers can restore the link between the OS and the controller when detection fails.”
- I reinstall drivers when the software does not detect hardware.
- I verify the correct port and connection in the motherboard settings and the BIOS.
- I keep software updated so gaming modes and speed controls remain compatible.
Final tip: thanks to modern utilities, color tweaks and sync are just a few clicks away. If software steps fail, return to the cable and hardware checks before proceeding.
Final Thoughts on Restoring Your Lighting Setup
Final Thoughts on Restoring Your Lighting Setup
A short, careful inspection of every cable and port usually reveals the issue fast. I hope this guide has helped you fix common rgb issues and get your fan lights back to normal.
Remember to test one connector at a time and confirm the controller and motherboard have the correct power. Small faults in a cable or a loose port often stop the lights working in a case.
Whether the problem comes from power, a BIOS setting, or a hardware fault, most problems clear with patience and a methodical approach. Thanks for reading — enjoy your gaming setup once the rgb lights return.
FAQ
Why are my case fan lights and blades not spinning or glowing?
I first check power and connections. Make sure the fan’s power connector is plugged into the motherboard or PSU and the lighting cable is attached to the RGB header or controller. If the fan motor won’t spin, test the fan on a known-good fan header or connect it directly to a 4-pin Molex/SATA adapter from the power supply. For lighting, verify the LED cable is in the correct RGB or ARGB port and the controller is powered.
How do I identify whether a fan cable or the lighting strip is damaged?
I perform a close visual inspection under good light, looking for frayed wires, kinks, or burnt spots on connectors. Then I swap the suspect fan with a working one to see if the issue follows the cable or stays with the header. If the wiring or connector shows physical damage, I replace the cable or fan assembly to avoid short circuits.
What should I do if the controller shows power but lights remain off?
I ensure the controller’s SATA or Molex power lead is secured to the power supply and the controller’s status LED indicates power. Next I confirm each fan’s lighting connector is seated in the correct channel and that any control switch on the case or remote is turned on. If the controller uses firmware, I check the manufacturer’s software for firmware updates or reset options.
How can I verify the power supply is providing enough power for lighting and blades?
I calculate total current draw for all fans and lighting strips and compare it to the PSU and controller ratings. Then I use a multimeter or PSU tester to confirm voltage rails (12V, 5V) are stable. If voltages are out of spec or the PSU is underpowered, I upgrade to a supply with higher amperage or redistribute devices across different rails.
Where in the BIOS do I change fan and lighting behavior?
I reboot and press the motherboard’s BIOS hotkey (Delete, F2, or F12 depending on brand like ASUS, MSI, Gigabyte). In the BIOS menu I open the Hardware Monitor or Fan Control section to access header options and the RGB control tab if present. I use those settings to switch headers between DC and PWM modes and to enable lighting control from firmware.
Should I use PWM or voltage control for my fan headers?
I recommend PWM for 4-pin fans because it gives better speed regulation. If your fan is 3-pin, use DC control. In BIOS I set PWM mode on matching 4-pin headers and configure fan curves to prevent sudden stops. Incorrect mode can stop fans or prevent the controller from managing speed and lighting.
How do I save BIOS changes and test them safely?
I choose Save & Exit in the BIOS after changing fan or lighting settings, then let the system reboot. I watch fans during POST and use a motherboard utility in Windows to fine-tune curves. If something causes instability, I load optimized defaults and reapply one change at a time to isolate the problem.
Which software should I install to manage lighting and fan speed on Windows?
I use the motherboard maker’s utility—examples are ASUS Aura Sync, MSI Dragon Center, Gigabyte RGB Fusion, or ASRock Polychrome—for integrated headers. For third-party controllers, I use the vendor’s app. I also keep chipset and RGB driver packages up to date, and I avoid running multiple RGB apps at once to prevent conflicts.
What if my lights work but colors are wrong or flicker?
I verify the correct connector orientation (3-pin ARGB vs. 4-pin RGB) and check software color profiles. Flicker often means a loose connection or insufficient voltage; I reseat connectors and test on another header. If the issue persists, I test with a different controller or replace the lighting cable.
Can a fan header be permanently damaged, and how do I confirm that?
I test the header with a known-good fan and LED device. If they fail to power from that header while working elsewhere, the header may be damaged. I avoid drawing excess current from a single header; instead I use a fan hub or connect directly to the PSU with proper adapters.
How do I safely reseat fan connectors and avoid static damage?
I power down, unplug the power supply, and ground myself before touching components. I gently unplug and replug connectors straight out to prevent bent pins. I avoid forcing connectors and check for keying tabs so orientation is correct. After reassembly, I power up and observe behavior.
What steps help when case fans spin but lighting stays off after software changes?
I first restart the system and open the RGB control app to confirm profiles and associations. I disable conflicting apps, reset the controller from the software if available, and try different lighting profiles. If software reset fails, I try a firmware update or a manual reset button on the controller.
When should I replace a fan or controller rather than keep troubleshooting?
I replace hardware when I identify physical damage, repeated failures after testing on multiple headers, or persistent shorting that risks other components. If firmware updates and software resets don’t fix intermittent behavior, buying a quality replacement fan or a compatible lighting controller solves the issue reliably.
Are there compatibility rules for headers, connectors, and lighting standards?
I match connectors precisely: 4-pin 12V RGB is different from 3-pin 5V ARGB. Using the wrong header can cause no light or permanent damage. I consult the motherboard manual and fan documentation for pinouts, voltage, and supported control protocols before connecting components.

Adrian Voss is an RGB lighting specialist and tech writer focused on customization, performance, and smart lighting systems. He shares hands-on insights, reviews, and setup guides to help users take full control of their RGB controllers and create immersive, personalized environments.